
If you’re a struggling musician who wants a DIY studio in the home or you want to deaden sound in the home environment, bass traps are ideal.
Bass traps are excellent for soundproofing most indoor spaces cost-effectively.
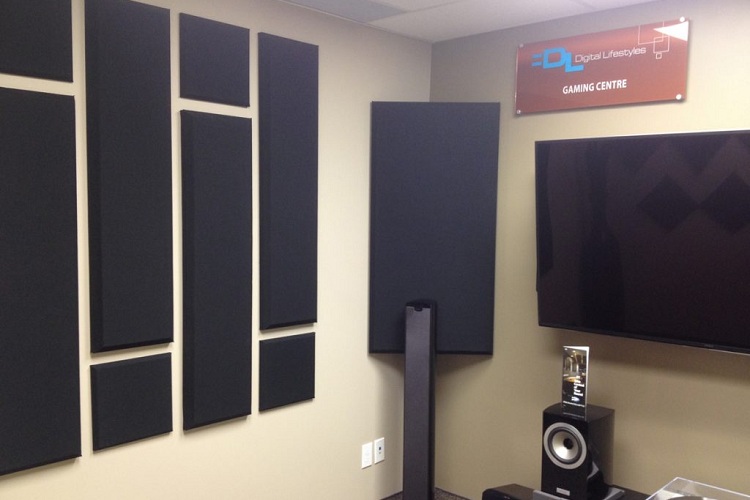
Take your project one step further by building traps for the first reflection points. Reflection points absorb sound before you hear it, just as bass traps do, but they provide additional acoustic enhancements.
But what are bass traps, how do they work, and can you make one yourself?
What is a bass trap?
Bass traps are devices that people use to trap soundwaves in a specific space. Sound waves reverberate through the area and bounce off various surfaces.
Because the soundwaves bounce off room surfaces, eventually, the vibrations decrease. The soundwaves become static and settle in room corners.
You can use base traps to absorb some of these static soundwave frequencies to improve the acoustic quality in the space.
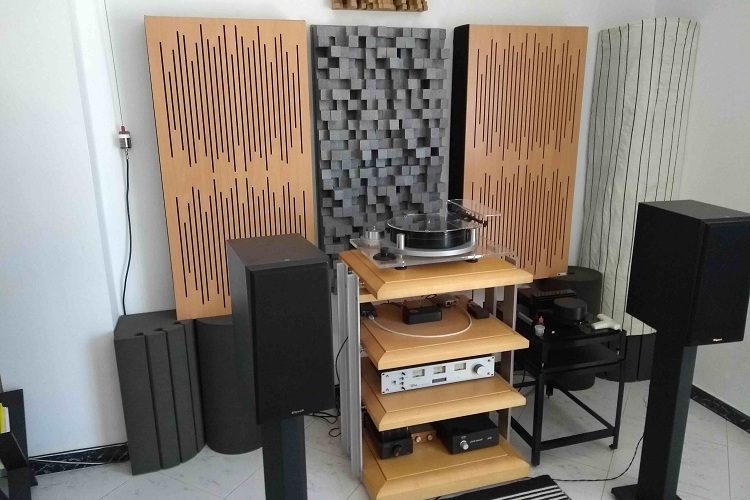
These bass traps effectively work when you place them in room corners or where walls meet, which is where low-frequency soundwaves typically settle.
As the low frequencies settle in room corners, the bass traps confine these vibrations and prevent them from blending with other noises.
In other words, bass traps help isolate stagnant soundwaves at low levels to produce better sound quality in the space.
Bass traps are available in different shapes and use various form-building strategies to isolate noise, depending on the room’s construction.
Some of these trap designs focus on limiting the effect of narrow frequency ranges, and others control a broader range of frequencies.
How do bass traps work?
Whenever a room fills with sound, it also fills with energy because it is energy at different frequencies. While soundwaves can settle in corners, it also settles along surfaces.
When you install bass traps in a room, they will absorb the energy of soundwaves and transform it into heat.
Bass traps generate a friction barrier that slows down the vibrations of soundwaves so that they are inaudible.
Besides being inaudible, capturing sound waves in traps prevents static noise from interfering with the new energy that you introduce into the room.
If you play music in the room, the vibrations in the air will eventually settle. When you play music consecutively, the static soundwaves from the previous period interfere with the acoustic quality of the music.
New music soundwaves meet and interact with the older static waves, causing distortion. People install bass traps to eliminate this distortion.
Bass traps contain insulation materials such as Dynamat to absorb soundwaves. When you place these traps in a room (especially the corners), you effectively modulate the airflow (gas) with insulation, which causes friction.
As new soundwaves flow through the area, the bass traps transform moving energy into thermal energy. As the soundwaves meet the resistance of the bass traps, they lose their amplitude.
Loud noise amplitudes show up as spikes on a sound-level meter, whereas softer sounds reflect as valleys.
If you install bass traps, the noise level in the room will decrease as the soundwaves meet the insulation material in the traps, and the energy transforms to heat.
While bass traps may sound complex, you don’t need to be an expert to create these devices yourself.
Can I make one myself?

Yes! You can make your own bass traps. With help from this guideline, you can create one or more bass traps for a specific area in the home where you want to enhance the acoustics.
To build your bass traps, you need:
- Roxul Rockboard works well for DIY bass traps. This product packaging comes with six panels, measuring 4”x2”, and is enough to build three panels as you only need two for each bass trap.
- One roll of duct tape for every four panels that you build.
- Purchase fabric that appeals to you to cover the bass trap. Fabric measurements should be approximately 5”x3” to cover each panel.
- Purchase enough lumber for the project. You should have enough lumber for each panel by the foot at 1’x4”. You should buy 4’12” of lumber for each Roxul Rockboard panel.
- A cutting tool. Scissors will work well to cut the fabric you use to cover the bass trap.
- A staple gun.
- Tape measure.
- Wood glue, screws, or nails.
- An electric drill or a screwdriver if you use nails or screws.
- Shelf brackets and studs for mounting the bass trap.
- Screw eyes and paracord (optional).
Follow our detailed guide with four steps to build and mount your bass trap.
Step 1: Build the wooden bass trap frame
You can ask the hardware store to cut your lumber to size or do it yourself. Build a wooden frame that measures 24”x48”x4” (W.H.D) on the inside.
You will use this basic framework to support the insulation panels.
If you are constructing 2″x4″ panels, these measurements will produce 24″x48″ internal sizes. The frame width will be 25.5″ to accommodate the 1″x4 planks, which measure a thickness of 0,75″.
Join the panels with glue, nails, or screws. If you prefer to use screws, then make guide holes before drilling.
Step 2: Attach the insulation panels to the frame
Place two insulation panels on either side of the frame and then secure these with duct tape. The outcome should be a rectangular shape panel in line with Step 1.
Using duct tape is not a highly sophisticated way to complete your bass panels, but it is effective. Importantly, this simple method of securing the insulation panels within the frame is durable.
Making bass traps this way means that your bass panels should last for years and survive quite a few moves. If you don’t move after building the bass trap, this should increase its longevity even more.
Tip: You can first make reflection point panels by using half the insulation to place at precise points in the area. With the proper positioning, bass traps and first reflection point panels will give you a professional acoustic outcome.
Step 3: Cover the panels with fabric
Throw the fabric out on a flat surface and place the panel on the material. The fabric measurements should be approximately 6″ to 8″ bigger than the panel. All you must do now is wrap the fabric over the panel edges to cover the insulation.
Wrap the fabric around the insulation and frame as tightly as possible before securing it to the frame with the staple gun.
Aim for a professional, clean finish to your bass trap so a tight wrap will look good.
Step 4: Mount the bass trap
You can take the easy route and place your bass trap on something to get them to reach higher up the wall, or you can rest it against the wall.
If you’re feeling professional, mount the bass trap on the wall with heavy-duty shelf brackets. The brackets must be strong enough to support the bass trap as this device is quite heavy.
Use studs for mounting rather than anchors, especially if placing the bass trap on drywalling, as the studs offer more substantial support.
Step 5: Bass trap placement
Mount the bass trap in a corner of the room. If you have made four bass traps, place these in each corner. Place each trap about halfway up the wall and orient them diagonally across each corner.
If you have been industrious and made eight bass traps, stack two traps in each corner. The bass traps will probably be big enough to cover the wall from the floor to the ceiling.
Diagonal placement takes up more space than mounting the bass traps flush against the wall. But with the way that the trap works, the area behind the device effectively absorbs more latent soundwaves.
You can also suspend the bass traps from the ceiling. If you use screw eyes in the frame, you can use a paracord to attach the traps to the studs in the ceiling.
This mounting method allows you to easily adjust the bass traps as you figure out their best positioning.
Conclusion
Making bass traps is easy if you have the proper equipment. You can save yourself a lot of money with a DIY approach, as these traps are simple to construct. Once you know how to do the job with a few simple guidelines–you can quickly prevent static soundwaves from interfering with acoustics.
Recap:
- Build a wooden frame
- Secure insulation panels to the frame
- Cover the structure and insulation with fabric
- Position and mount the completed bass traps
Take your soundproofing project one step further by building first reflection point traps by halving the thickness of panel insulation for a job that mimics what the professionals would do at a fraction of the price.
Resources: