
Noise pollution is a big problem everywhere but it’s the worst when you have to deal with it in your own home.
Soundproofing foam panels are an affordable and easy to use solution for when there is just too much noise. They’re great for things like recording any kind of audio or video and for practicing instruments without bothering other people in the house.
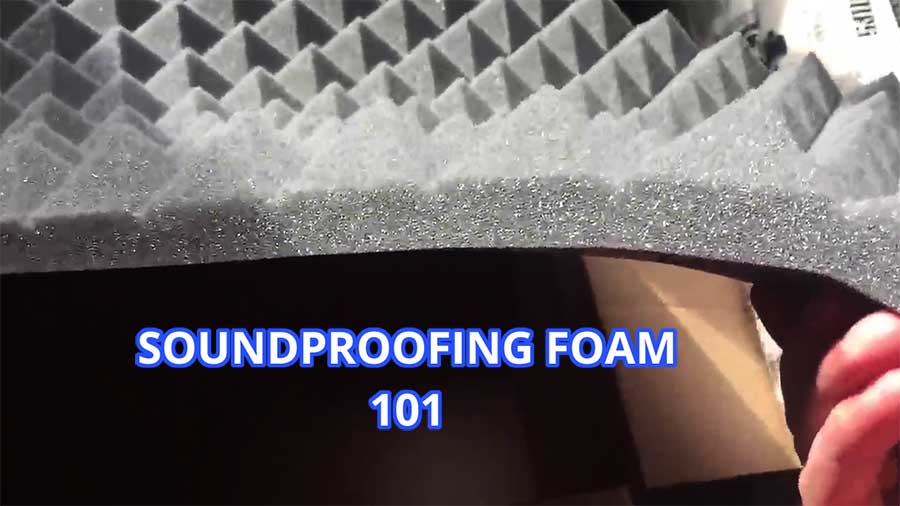
Like with anything, there are both excellent and terrible foam panels out there. I’ve done the research and tried a number of panels to find the best options. Check out my list of the best options below.
Best Brands & Foam Panels That Really Work
12 pack 12″ by 12″ Wedges – Affordable Solution
This can look really nice, especially when arranged in an alternating pattern of vertical and horizontal. Each panel is one square foot and one inch thick.
I do wish they were a bit thicker but they are thick enough to make a noticeable difference to a room’s acoustic profile. You can get them in a few different colors which opens up your design possibilities.
These are some of the most affordable foam panels you’ll find. If you don’t have a ton to spend but want some decent soundproofing, these are a great option. They will do an adequate job at reducing echo by dampening sound waves and minimizing reverberation.

These panels reduce noise and echo but don’t distort the sound at all. This makes them great for recording and playing music. Unfortunately, they won’t be very effective for low-frequency sounds but that is the case for most soundproofing foam solutions.
The biggest downside to these panels is that they are not as durable as they could be. Because they are relatively thin and flimsy, they rip easily and you might accidentally mess them up when installing.
They are also just a bit weaker than they could be and you can expect some crumbling of the foam after a few years. Like other panels, they do collect dust but they are pretty easy to vacuum. These do have some fire-resistant properties which is a nice bonus especially considering how affordable they are.
Egg crate Foam 48″ X 24″ Panels – Studio Quality
These panels are extra thick, at 2.5 inches. This helps them to have a very high noise reduction coefficient level. These foam panels are also much larger than other soundproofing foam panels, at 4 feet by 2 feet. This means you won’t have to buy as many of them. It also means that installation will be a lot easier.
Your foam will come compressed, either rolled up for flattened in plastic. It will probably take a few days for them to fully expand and shape up. You will want to give them time to expand before installing them on your walls.

If you do need to cut the big panels to a smaller size, you can use the smaller pieces for these kinds of alternate uses.
You can also use them for creating a small soundproofing box to put around a microphone. This would let you get the same soundproofing effects to record great audio without having to put them all over on the walls.
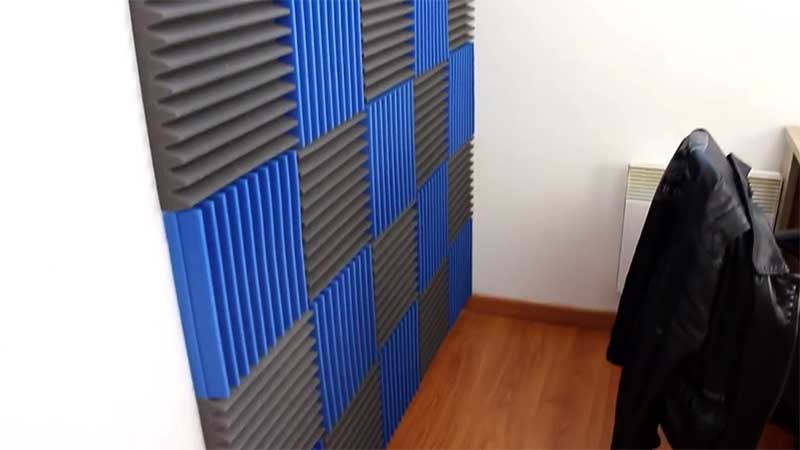
Bicolor Wedges Foam Panels – Fire-retardant
These panels, on the other hand, will actually act as a fire retardant. They have a Class A Fire Rating. If safety is a top priority for you, these might be the right panels for you.
I really like that you get two colors with this set, maroon and gray. This is a very pleasing color combination that will let you create a really nice grouping of panels on your walls.
The deep ridge design also opens up some nice pattern possibilities. For example, it looks great to alternate both colors and vertical or horizontal ridges. The panels are nice and thick at 2 inches and they have a density of 1.2 lbs. per cubic foot. This will do an excellent job of absorbing and reducing sound.

Quality control can really be lacking with a lot of soundproofing foam. You’ll see a lot of jagged edges that just look bad. These panels stand out for being nearly perfect with clean, squared edges on each panel. This helps you line up your panels perfectly and helps you create a nice design.
These USA-made sound-proofing panels should stand the test of time without the risk of crumbling or hardening like you’ll see with some panels. Like most foam panels, they can be dust magnets but you can take care of that with occasional vacuuming.
The panels come in a plastic bag and they might be a little bit squished. They will expand and shape up within a few days. There is also a bit of an unpleasant smell to these panels at first but that too will dissipate within a few days.
Flat Sound absorbing Panels – Aesthetics First
The design of the panels you choose really comes down to personal preference. Most panels have some kind of 3D design, generally to enhance soundproofing.
These panels from BQLZR stand out for their flat design. Although a flat design usually isn’t quite as effective at reducing sound, these flat panels look great and do an excellent job of minimizing sound.
They are just under 1 inch thick but because they are made from fiberglass, they do really absorb sound well and reduce vibration. They have a noise reduction coefficient score of 0.85, which is very good.

These are another example of panels that have fire retardant capabilities. They meet the UK Flame Retardant standard.
The biggest downside to these panels is the price. Especially if you need to cover a large area and need to buy several sets, it will be a pretty big investment.
That said, these do a great job and look very nice. I like that you have a choice of colors as well. Some of the colors are less expensive but they are also less pleasing to the eye, in my opinion.
Mutex Soundproof Material – An Alternative to Classic Foam
This unique material is made from a combination of polymute resin and interlocking carbonweave. The polymute resin blocks noise while the carbonweave absorbs sound.
This is especially effective at minimizing the sound of vibrating surfaces like with dishwashers, air conditioners, ductwork, doors, walls, ceilings, floors, and piping. It’s also a really effective option for industrial or commercial situations. It will work really well in a garage as well.

A lot of soundproofing foam will compress over time but this material will not. That means that this is a one-time investment. For best results, you need to apply this behind the drywall. That means this will be easiest to use when you are building or renovating. It might be a bit of hassle to install it on finished construction. It is possible to put it on the outside of the wall but it will not be as effective as putting it behind the drywall.
Another option is to use this on DIY panels. Applying some of this to some rockwool board and covering it with a nice-looking fabric will do a decent job of blocking and absorbing sound.
Soundproof Foam Panels Buyer’s Guide
How-to Use & Install Soundproofing Foam Panels
Installing soundproofing foam panels on your wall can lead to some pretty significant damage to the wall if you don’t know what you are doing.
Spraying the panels with adhesive and applying directly to the wall will definitely result in damage, and maybe even significant damage. Likewise, stapling or nailing the panels to the wall will result in damage that can easily be avoided.
The goal is to get your panels securely on the wall to help you create the ideal acoustical environment without causing any damage to your walls. Luckily, this is entirely possible. Follow these steps to get your soundproofing up without any expensive damage to your walls.
1. Decide how you want to arrange the panels first.
A lot of people will just start hanging up the panels without a clear plan. This might end up making more work for you in the long run.
Measure if you need to and decide where you’ll be placing the panels. Arrange the panels in the order you’ll be putting them up. If desired, mark the walls with some painter’s tape or something similar so you know exactly where to apply each panel.
2. Mount the panels on cardboard using spray adhesive.
If you plan to only place single panels here and there, you can skip this step. If you’ll be grouping the panels in groups, it makes sense to mount them as a unit. Spray the backs of the panels with some spray adhesive like the Loctite 200 High-Performance Spray Adhesive or the 3M Hi-Strength Spray Adhesive. Affix the panels to the cardboard.
Let it dry. Then, cut off any excess cardboard so the panels will end up looking great on the wall.
3. Attach the grouped panels using 3M Command Strips.
The Command Picture & Frame Hanging Strips from 3M are the perfect solution for hanging things on the wall without risk of damage.
Foam panels aren’t heavy but a group of four or more panels mounted on cardboard is a bit heavy, so I like to use the larger heavy duty Command Strips, compared to the smaller ones. Just apply a few strips to the cardboard on the back of the grouped panels. I recommend applying a strip at the top two corners and maybe one in the top center if you made a particularly large panel.
The application is pretty simple. You just remove the strip covering the adhesive and then apply a bit of pressure. With these Velcro-like strips, you’ll need to apply one to the back of the foam panels and one to the wall itself. Once you have all of your strips placed on both the panels and the walls, just press the panels into the wall to connect with the Command strips on the wall. What’s nice about these is that they are pretty easy to remove so if you don’t get the placement just right, it’s not too difficult to move them around.
If you don’t want to deal with the cardboard, you can also apply a Command Strip directly to the back of every foam panel. If you are using this method, you’ll need a lot more strips but you can probably get away with the smaller strips like the Medium or even Small strips. You can also get away with using only one strip per panel. For an individual panel, I recommend placing the strip in the top center of the panel.
One important point is that if you are placing these panels on the ceiling, you may want to add an extra strip or two.
Instead of just placing strips at the top of each panel, I’d recommending placing them on both the top and the bottom. Hanging vertically on the wall is very different than hanging upside down on the ceiling and it places a different kind of pressure on the Command Strip. If you are installing a particularly large carboard-backed panel on the ceiling, you might need several Command Strips.
If the panel falls down, just add a few more strips until you find the magic number. Luckily, most of these foam panels are pretty tough so a fall from the ceiling shouldn’t cause any damage.
What is soundproofing foam made of?
Generallly, soundproofing foam panels are made from acoustic foam. This is a special kind of foam that is open-celled, usually polyurethane-based, either polyether or polyester or extruded melamine.
This makeup increases air resistance which in turn reduces the amplitude of sound waves. Soundproofing foam absorbs sound by controlling the reverberation.
In the case of the BQLZR Flat Sound Absorbing Panels, they are made from fiberglass. Fiberglass is effective because the friction between the air particles and the fibers causes a loss of energy in the sound waves.
This reduces the sound amplitude. In the case of the Mutex Soundproof material, it is made of polymute resin and interlocking carbonweave. These two materials work together to both block noise and absorb sound.
The chemical makeup of many of these soundproofing materials means that there may be a slight chemical odor at first but they are perfectly safe and the smell won’t take long to dissipate.
Where to buy soundproof foam panels?
You can’t generally find these panels at the store. Some specialty sound and tech stores may have some in stock but your best bet is to order online.
It’s definitely the easiest and fastest way to get the exact amount of foam you need. You’ll also find that you can generally get the panels at a much cheaper price online. (check the products at the top of this page, they are the best deal on Amazon) The list above has soundproofing foam panels to meet every need.
The most affordable solution is the 12-pack of 12″ by 12″ Wedges panels but there are options for every price point and every design aesthetic.
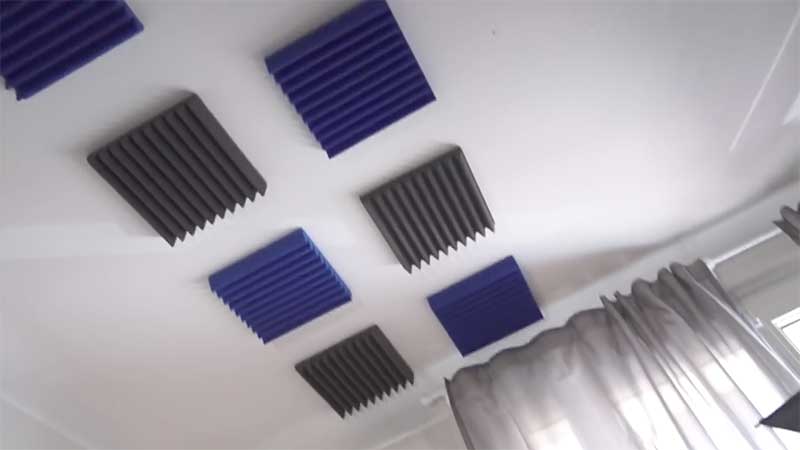
Doors, Walls, Ceiling?
Where to place your panels is an important question. You can put soundproofing panels just about anywhere and doors, walls, and the ceiling are all reasonable locations. Your ideal placement really depends on what you use the room for.
If you’re soundproofing for a recording studio or a listening room, you will want to place the panels in certain locations. Your main priority for this kind of setup is to determine the reflection points where sound bounces off.
Check out this video for some tips on determining your ideal placement based on your intended usage for the room.
- If you just want to reduce sound in your room, you can place foam on your door to help block out sound from outside the room. Placing foam on the walls will also help.
- If you want to block or minimize noise from above, place foam panels on the ceiling.
Ultimately, placement of foam panels will often require some experimentation. When you use the Command Strip method described above, it’s not too much of a hassle to move your panels around.
Effectiveness for Drums
Soundproof foam will help somewhat with blocking the sound of drumming from filling the rest of the house.
They will only be able to do so much, though. Echo or reverb is one of the biggest factors that makes drums sound so loud and the foam panels can definitely help to minimize that.
However, they aren’t as effective at blocking low-frequency sounds like the kick of the bass drum. Foam panels will do a better job at reducing the sound within the drumming room than they will at blocking the sound from getting to the rest of the home.
There are a few things you can do, though, to try to minimize how loud the drums are elsewhere in the home.
In addition to using soundproofing foam throughout the room, it’s a good idea to use some kind of door seal. A lot of sound from drumming can get through a door, especially through the door sweep area.
A lot of sounds can also come through your HVAC system. A magnetic vent barrier can be placed over vents while the drums are being played and this will minimize the sound that gets through.
You should also put a nice heavy duty rug underneath the drumset itself to minimize vibrations. Putting some Mutex Soundproof Material underneath this rug is a good idea.
Without spending several thousand dollars on a more involved and permanent solution, you won’t be able to fully soundproof a room to the point of blocking the sound of drums.
You will be able to noticeably reduce the amount of sound in the room and the amount of sound that gets through, though, at a reasonable cost using foam panels and a few other tools. A combination of the BQLZR Flat Sound absorbing Panels and the Mutex Soundproof Material, along with a door seal and a vent barrier, will be your best bet in reducing drum sounds.
Soundproof Foam VS Fiberglass Insulation
In a head-to-head matchup, fiberglass insulation will generally win when it comes to soundproofing. You just get better sound absorption with fiberglass insulation.
This is especially true with low-frequency sounds. That said, fiberglass installation is something that requires a lot more effort to install. It’s great to add during construction or renovation but it’s a major hassle to add it on its own.
Soundproof foam, on the other hand, is much easier to work with and it’s generally a lot cheaper. It’s also all you need for a lot of situations so there’s no need to spend the extra effort or money on fiberglass insulation. Soundproof foam installation is something you can easily handle in an hour even if you’re not very handy.
Fiberglass installation requires more time and it’s a project best left for someone with some construction or renovation experience.
How about Acoustic Spray foam?
Acoustic spray foam can be very effective at blocking sound. It’s especially great for blocking sound in between floors so you don’t hear so much noise when someone is walking around above you.
The problem with acoustic spray foam is that you can really only use it when you’re building or when doing major renovation work. You technically could just spray it anywhere and it might block some sound but it will look awful and will leave a huge mess.
If you’re building or renovating and you want to maximize your soundproofing, acoustic spray foam is terrific but otherwise, I don’t recommend it.
Can I make my own soundproofing foam panels?
If you like a good DIY project, it is possible to make your own soundproofing foam panels. This does give you a little bit more creative control over how it looks. That said, DIY soundproofing will definitely cost more money and more energy. You will need to buy a mineral wool board or fiberglass board as well as some screws, adhesive, and fabric. The fabric cover is where you can play interior decorator and create your ideal design.
Another great DIY soundproofing foam project is to make a microphone isolation box.
This is great for anyone who needs to record high-quality audio, like a musician, a podcast host, or a voiceover artist. Check out this video to see how to complete this project. I really like this idea because it can save you a lot of money. There isn’t a need to soundproof the entire room so you don’t have to buy as much soundproofing foam.
Adding soundproofing foam panels to a few rooms in my home has really made me happier.
I can now record videos and participate in conference calls without annoying echoes and reverb making it hard for others to hear me clearly. I’m also going to get back into playing drums.
How will you use your soundproof foam panels? Do you have any questions about these panels? Let me know in the comments!
Is it necessary to leave a vent exchanger between a dining room wall and a bedroom in an older bungalow built in the 50″s-60’s when it is just a hole between the two rooms. It is not hooked up to any heating or cool air duct work. Is it okay to just replace the vents with drywall and seal completely ?
Without spending a fortune, can anything be done to try and lower the noise level, echoing and vibrations in a very large dog kennel? The floors are concrete, walls are cinderblocks and the “doors” are metal fencing materials. The ceiling is very high too. The constant barking of about 100 dogs is deafening! I am sure all the “noise” is very hard on the dogs too. It’s heart breaking to see so many of the dogs — especially the smaller dogs — trembling and shaking due to the incessant barking. I realize the facility cannot be made soundproof — but I hope there are ways to “quiten” the constant noise. Any suggestions would be greatly appreciated! Thank you!!
Hi Bev,
It seems very challenging… You can reduce the noise by soundproofing the doors, and reduce echo by using foam panels on the walls but it’s going to be complicated to really remove all barking noise. Maybe it would be more effective to look for a way to reduce the barking behavior, maybe keeping them entertained somehow? I would consult with a dog trainer, you might have more luck going this route.
Bev
Were you able to find a solution?
I would like to purchase Acoustic Foam,in your store/company i would be happy if you can get back to me again with the prices and dimensions you having available in a moment,and also do you take all types of Credit Cards as your payment required?Kindly get back to me here so that we will work together as one panther. All the best and stay blessed.
If I want to keep the person on the other side of my cubicle wall from hearing what I say, does it matter which way I face the foam? Or are both sides of the foam the same texture/design?
Thank you doe this information. How about blocking or minimizing noise from downstairs? Redoing the hardwood floor to add insulation layer underneath is not an option unfortunately.
Thank you!
I have a grand piano in a smallish room. After removing the carpeting it sounds terrible due to reverberation. Will foam panels on one wall help this? The room also has a high ceiling. I can’t move piano without damaging the new floor. Does it matter which wall (i.e. how close to piano strings) is covered with foam in this case? Thank you!