
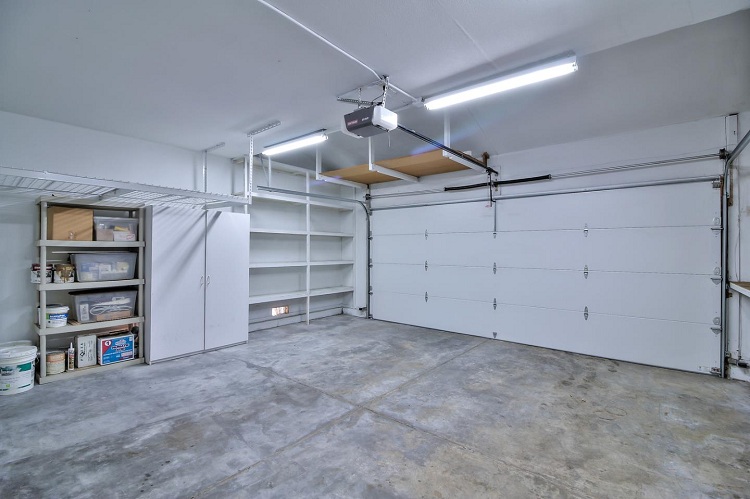
Your garage door is often pitted with gaps that allow wind and noise to enter and internal noise to escape.
Whether you have a roll-up garage door or top-down closing mechanism, it is almost impossible to soundproof it completely.
But you can take steps to limit incoming or outgoing noise to create a better space for yourself.
Discover why people want to soundproof garage doors, what equipment you need to complete the job and what steps to take to carry out the mission—’soundproof garage door.’
Why would you want to soundproof a garage door?
Homeowners want to soundproof garage doors for several reasons. Mostly, people want to keep the outside world’s noise at bay while working in this space.
Other people want to limit the noise effect of their garage hobbies on their neighbors.
When you soundproof a garage door, you can work in peace throughout the day or the night without disturbing the neighbors.
Consideration for neighbors is an excellent reason to make your garage door silent, as is creating a workspace that shuts out external noise.
Before you set out to soundproof your garage door for personal reasons, you will need the proper tools and equipment to do a great job.
Tools and equipment needed
Before rushing off to the local hardware store to purchase soundproofing materials, do some practical planning.
Check your garage door to see where there are gaps and the opening and closing mechanism of the door.
Also, establish the material used to construct the garage door. Is it metal, wood, or some other material? Is the garage door smooth, or does it have a design pattern with ridges?
These factors will influence the type of adhesive you purchase.
You will also want to purchase an insulation material that is thin enough to fit the garage door and allow you to open and close it without it constantly sticking.
It will be a huge shame if you go through to the expense of purchasing materials and doing the job, only to find that your efforts were a waste of time.
Once you are clear about these issues, put together a shopping list of the tools and equipment you will need to execute an excellent garage door soundproofing job.
The standard tools and equipment to soundproof a garage door include:
- Mass loaded vinyl (MLV), fiberglass, sound deadening blankets, or acoustic foam panels.
- Nails or screws
- Weatherstripping
- Garage door seal kit
- Measuring tape
- Cutting tool
- Green glue or spray adhesive
- Garage door motor lubricant
Before you do any shopping, measure your garage door so that you order the correct length of soundproofing materials.
Once you have your tools and equipment ready, follow this step-by-step guide which comprises six steps:
A step-by-step guide to soundproofing a garage door
Our guide walks you through how to soundproof a garage door. If you follow our guide with attention to detail, the result should be a door that reduces noise levels significantly.
Step 1: Lubricate the garage door mechanisms
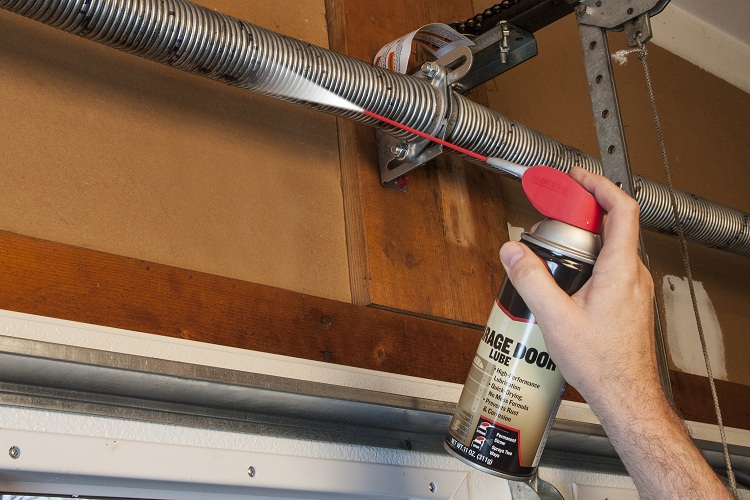
If you operate your garage door with a motor, lubricate the motor to ensure smooth working.
Also, lubricate the opening and closing mechanisms of the door to reduce noise as much as possible whether the door works on a motor or not.
Step 2: Measure your garage door
You cannot do a proper soundproofing job unless you measure the garage door. Keep these measurements handy so that you cut the soundproofing material to size.
Step 3: Cut the soundproofing materials to fit
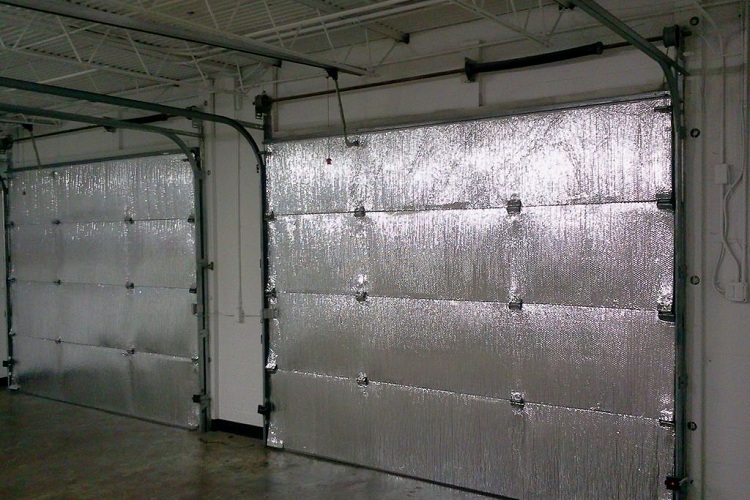
Use mass-loaded vinyl (MLV), sound deadening blankets, or acoustic foam panels to soundproof the door.
Either of these product types will help absorb sound or deflect sound waves to create a quieter space. Whichever materials you purchase, cut these to size for careful placement on the inside of the garage door.
You can also consider using fiberglass panels to absorb or reflect noise in the garage.
Cut each piece of soundproofing material slightly smaller for the door edges, depending on how big the spaces are between the door and the walls.
Step 4: Apply the insulation
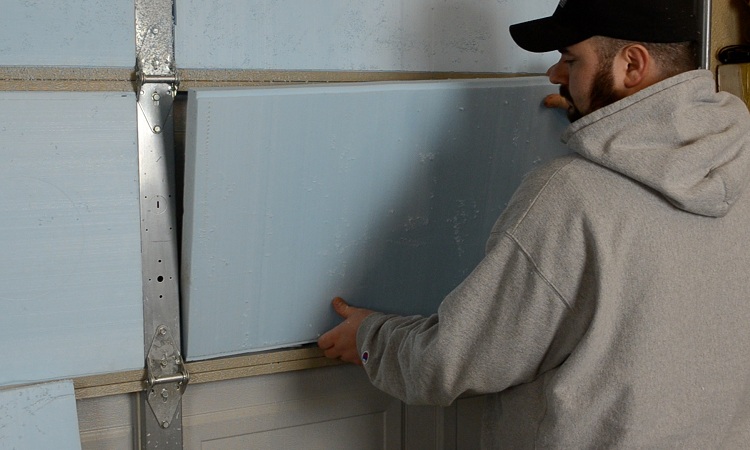
After preparing the soundproofing material, you will have to apply the adhesive to the garage door to secure the soundproofing on the door.
Make sure that you clean the garage door properly and allow it to dry before attempting to secure the soundproofing material to the door.
If the door is dirty, this will affect how well the soundproofing sticks to and stays attached to the garage door.
Use a green glue adhesive to secure the MLV or acoustic foam panels to the garage door. If you can’t find a green glue adhesive, use another suitable glue for this purpose.
Often, soundproofing materials sell with the right type of glue for the job, but always check whether the glue is designed to stick to butyl-based products, wood, metal, or other surfaces when making a purchase.
Fiberglass strips can be hung against the garage door to effectively deflect all noise levels. Attach these hanging fiberglass panels with adhesive, nails, or screws.
You can install acoustic foam panels to the garage door for a superior soundproofing experience. You can apply the green glue adhesive or use a spray-type adhesive to stick the acoustic panels to the door.
Step 5: Apply weather stripping
Garage doors typically have gaps on the top, sides, and bottom of the door. Improve your garage soundproofing endeavor by apply weather stripping to close any gaps.
Use weather stripping to help seal the bottom of the door and create a better soundproofing job.
Step 6: Use your garage door kit for extra sealing
Add to your DIY efforts with a garage door seal kit. A garage door kit will help seal the sides and top of the door to prevent noise from entering and escaping the space.
Another benefit of using the garage door kit and soundproofing materials is that you will keep the weather out and save on power bills.
The garage door kit includes devices with fins made from a vinyl type material. Install these along the top and sides of the door for additional sound-deadening benefits.
These fins are simple to install by following the instructions that come with the kit.
Tip 1:If you have a roll-up garage door, none of these insulation methods will work. The alternative is to hang sound-deadening blankets inside the garage over the roll-up door.Be careful to hang the blankets properly, so they don’t get caught in the door.
Tip 2:If you have exhausted all your alternatives to insulating the garage door and find that the door won’t close, consider installing a ready-insulated door. You can install the door yourself or get the experts to do the job.
Conclusion
To soundproof a garage door, you need a few essential tools and the proper insulation materials.
Once you measure the garage door, it is a relatively quick and easy process to cut the soundproofing material to size.
Once cut, it is just as easy to apply adhesive to the garage door and apply each panel of the soundproofing product.
To recap the step-by-step guide to soundproof garage door–all that’s necessary is to follow six basic steps:
- Lubricate the garage door mechanisms
- Measure your garage door
- Cut the soundproofing materials to fit
- Apply the insulation
- Apply weather stripping
- Use your garage door kit for extra sealing
Remember to purchase a thin soundproofing material that works and allows you to open and shut the garage door. Give yourself credit for an excellent soundproof garage door job.
Resources: