
In the realm of possible sound treatments you can use at home, the diffuser is one with a lot of merits.
Unlike other forms used to soften, deaden or absorb sounds, a diffuser gives it a more natural feel, and if you can’t afford the high cost of professional installation, there are some great DIY alternatives.
How does a sound diffuser work?
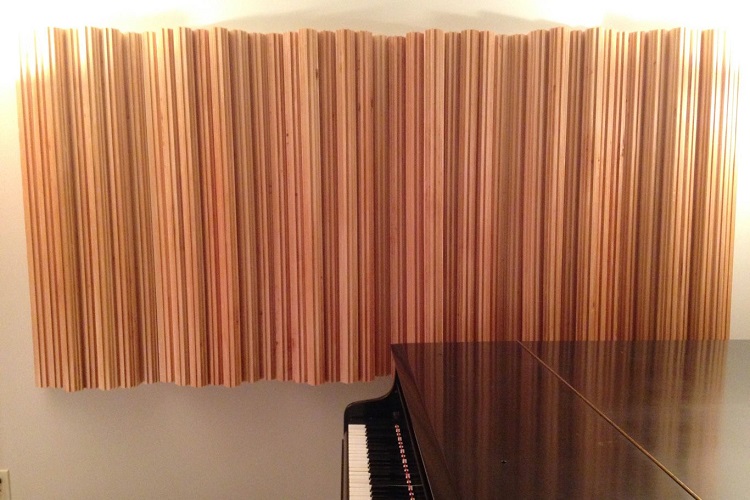
A diffuser is created by combining different heights and shapes like walls and towers, so that sound waves hitting it will be softened more naturally.
The device helps to scatter soundwaves at different, calculated places so that it deflects in many directions and sounds better than simply blocking or absorbing it.
If you’ve been thinking about adding a diffuser to your media room or want to improve the audio coming from your speakers, creating DIY sound diffusers is the easy way to go. We’ll walk you through the tools and steps needed to make one yourself and how these homemade versions differ from the real deal.
What Is A Sound Diffuser?
A sound diffuser is a type of acoustic treatment used to make sounds more natural, and it does this by reducing echoes and reflections that occur in a room.
To be able to achieve this reduction, the man-made device features many different surface heights and shapes so that the sound waves hitting it are scattered randomly, even if it does require some calculation to get them right.
The sound waves will hit the diffuser at different angles, and thanks to its unique shapes and patterns, be scattered around the room in different directions.
With this action, it reduces echoes and reverberation, absorbs some of the sound waves, amplifies them more naturally, and prevents them from sounding dead or hollow.
DIY Sound Diffusers Vs Professionally Made
Adding acoustic treatments to your home can have lots of benefits, but many professionally made options are costly, and not always financially achievable in a regular household.
A standard wooden diffuser can cost up to $1,000 when custom or professionally made, and while they do a good job of improving sound quality, you can make one yourself that costs just a fraction of that.
Of course, there are benefits to purchasing a professional sound diffuser, including better quality of craftsmanship and minimal effort on your part, especially if you don’t consider yourself handy.
However, if you’re looking for a DIY project or don’t have the money to spend, you can make one yourself that still gets the job done and it’ll cost less than $50 for the materials.
Tools and Planning
Before you can jump into building a diffuser, you need to do some planning. The best material for these accessories is wood, as it has natural acoustic properties and will look nicer than other cheap materials like rubber or plastic, so you’ll need to know where to get it
Secondly, you have to think about the placement of the diffuser, which can be determined depending on the room it’s in and where the main source of sound is.
You’ll want the diffuser to be opposite it usually, or in a reflective position that can help bound the sound waves back at different angles.
Finally, consider what type of sound diffuser you’re going to build, as they can each achieve different things.
For the purpose of this tutorial, we’re going to outline making a QRD as they’re relatively easy for beginners to master and are still effective, but you’ll still need to find a template that matches the size and shape that suits your space.
Depending on the size, there will be a variation in the size of wood and the heights and widths of each piece that you cut, and you’ll need the tools to cut and measure.
The easiest way to create a QRD is by using an existing wooden cabinet or frame and then sectioning boards to fit inside as dividers, and then slats and square poles to go inside of them.
Simple Steps to Make a DIY Diffuser
This is a general outline of the steps needed to make a diffuser, but depending on the style you’re making and its measurements, you’ll have to set out the right size of cuts and shapes. Here are the steps to take to make a QRD diffuser:
- Find a cabinet with four sides and a back that will form the basis of your diffuser. Remove any interior pieces of wood or obstructions in place.
- Use a tape measure and pencil to mark out the cuts you plan on making. Start with the larger boards and then the square poles that will fit inside of each well.
- After cutting each piece of wood, mark it with a pencil so you know what it is. It’s common with diffusers to have up to 100 pieces of wood so you want them categorized.
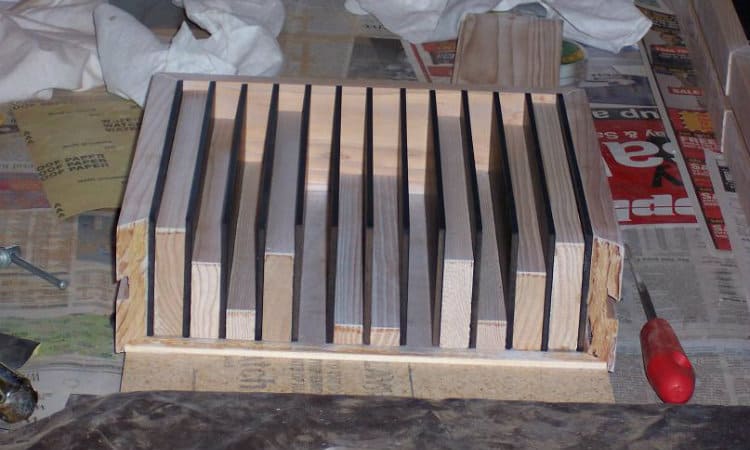
- Follow the pattern depending on the size of diffuser you’re making, and stack the various pieces of wood together as instructed. Start with the vertical pieces of wood and stack them at the back of the cabinet, and glue them into place using dedicated wood glue.
- Next, add the supporting blocks so that they slot in between each of the vertical pieces of wood and glue them as well.
- Add the smaller square poles in between the dividers as well, then glue them down.
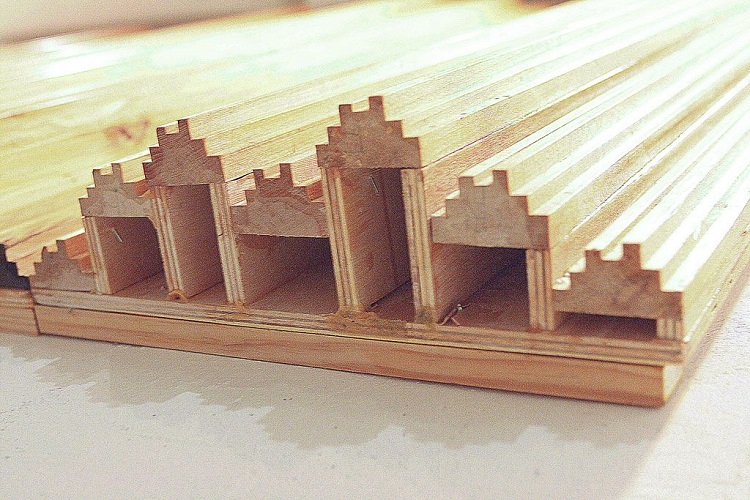
- Make sure the heights of each piece of wood measure correctly, otherwise glue down additional layers of wood to get it to the right height.
- Give the wood glue at least 24 hours to dry before attempting to hang the sound diffuser.
- When hanging, consider the weight to come up with the best mounting solution, and make it’s placed in the optimal position to reflect sound from the main source.
DIY Your Way to Better Acoustics
Sound diffusion isn’t just a method for professionals anymore, now that everyday people can make DIY diffusers and get great results. If you don’t want to spend hundreds to get the same sound experience, take some time to create your own diffuser and hear the difference that it brings.
Related Questions
Acoustic treatments aren’t just used in professional studios and cinemas; they can also be applied in the everyday home for an improvement in sound quality and audibility.
To learn more about the possible methods you can apply, read these FAQs and our answers to find out how to expand your home’s sound capabilities as well.
What Absorbs Sound the Best?
Choosing materials that are soft and pliable will get the best results if sound absorption is your goal.
It’s this reason why carpets and rugs are popular methods of sound absorption in studios and other professional settings, and they can be applied in the home for good results as well.
What Is the Cheapest Way to Acoustically Treat a Room?
Cheap methods for acoustically treating a room include hanging acoustic panels, using varied textures and shapes in your furnishings, opting for soft and pliable materials in furniture and accessories, and making some DIY treatments like sound diffusers and absorbers out of wood and fiberglass to hang on the walls and ceilings.
Resources